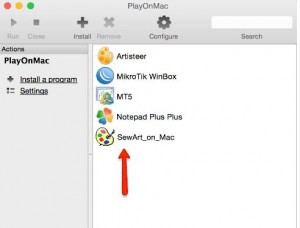
Installing the PlayOnMac© Windows Emulator to Run S & S Software on a MAC Computer
Click on the Mac Download button on the product webpage (for SewWhat-Pro, SewArt, or SewWrite). This will save the software installer package(s) to your MAC computer. Then follow the steps below to install the PlayOnMac Windows emulator. After installing PlayOnMac, you can repeat the necessary steps to install additional software packages as required.
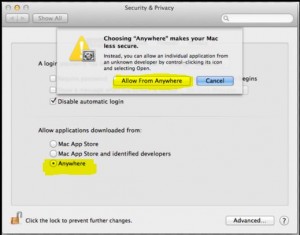
Before installing PlayOnMac, go to your MAC System Preferences. Select Security & Privacy. Select the General Tab. At the lower left of the dialog box (see figure below), you will see a padlock. If the padlock is locked, click the lock to unlock it to allow you to change the security settings. You may have to enter your login info. You will see “Allow apps downloaded from” in the Security & Privacy dialog box and three choices to select. Click the radio button “Anywhere” to select it and close the dialog box.
- Go to PlayOnMac© to download this free emulation software on your MAC. (You must use the MAC Download buttons on our webpages.) PlayOnMac allows you to easily install and use software on your MAC that was designed for Microsoft Windows©.

- Once downloaded, install “PlayOnMac_X.XXdmg” on your desktop by double-clicking the file. Follow installation instructions and finalize the PlayOnMac Installation.
- Go to “Configure” by clicking the gear icon on the top bar (shown below).

IMPORTANT: This tutorial uses SewArt as the S & S software being installed with PlayOnMac. To install any other S & S Mac-compatible software (for example, SewWhat-Pro or SewWrite), just replace the SewArt example used here with the appropriate other software product.
- Create a new virtual drive by clicking on the New button:

- This will launch the virtual drive creator wizard. Click “Next” to start the drive creation.

- Select “System” and click “Next”.

- Specify the name for the virtual drive (SewArt_on_Mac in this example), being sure to NOT include any spaces in the name. Click next and wait for the virtual drive and WINE to configure. This may take a few moments to complete.

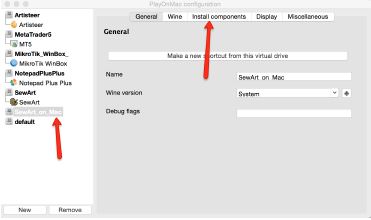
- Once the virtual drive is created, you will be returned to the virtual drive directory list where you will see that your new virtual drive is listed. Select it (“SewArt_on_Mac” for this example). First click on the “Wine” tab (2) and then the “Configure Wine” button (3). At the bottom of the “Applications” tab window set the default Windows version to “Windows 7”. Click on “Apply” and close all the Wine configuration windows.

Having returned to the PlayOnMac main configuration window, click on the “Install components” tab. This is the tab where you will select dependency libraries to install.
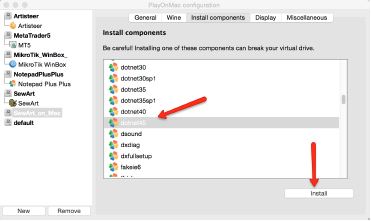
- Select dotnet45 and click the “Install” button. Repeat this step for the following required framework libraries:
Base Library Support
–- Microsoft Core Fonts
-– vbrun6
-– vcrun2013
-– vcrun6
— msvc100
— mfc42
Additional Font Support
— FontsSmoothBGR
— FontsSmoothGrayScale
— FontsSmoothRGB
— RegisterFonts
Additional Graphics Support (it is mandatory to install this dll)
— gdiplus
Optional Installs (not required but suggested)
— amstream
— atmlib
- Close the PlayOnMac configuration window. Once you have returned to the normal PlayOnMac applications screen, click on “Install a program”.

- This will launch the PlayOnMac install menu. Click on “Install a non-list program” at the bottom left corner.

- This will launch the PlayOnMac Wizard so that you may begin installing the S & S windows application (SewArt in this example). Click on the next button of the following information screens until you reach the “Manual installation” wizard screen. Click on “Next” to start the setup.

- Select “Edit or update an existing application” and click “Next”.

- Check the box next to “Show virtual drives”. This will display all the virtual drives on the system. Among them will be the one you created in Step 7. Select the virtual drive you created (“SewArt_on_Mac”) and click “Next”.

- The next screen will ask if you would like to perform any actions before installing your software. If you followed all the steps above and installed the correct frameworks then just click “Next”. If you missed anything select “Install some libraries” and then follow the prompts and select what you wish to install. (We will assume that the installation up to this point is correct and doesn’t require further libraries.) Finish this step by choosing “Select another file” and click “Next”.

- Click on “Browse” and select the installation file InstallSA-Mac.exe (for SewWhat-Pro, this would be InstallSWP-Mac.exe, for SewWrite it would be InstallSWR-Mac.exe) which you must have previously downloaded from the S & S Download webpage. Click “Open” to begin the installation process.

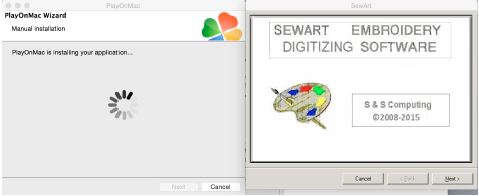
- The SewArt installation screen will appear in a moment. Follow the installations instructions (just as you would on a Windows system).

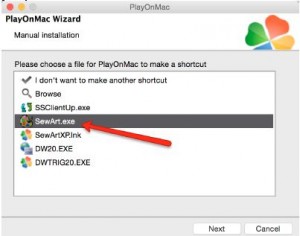
- Once the installation is complete, the virtual (Wine) drive will be reconfigured (which may take a few moments). You will then be asked to select a file (“SewArt.exe” in this tutorial) for which a PlayOnMac will create a shortcut. After selecting “SewArt.exe” from the list, click “Next”.

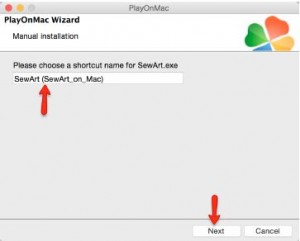
- You will then be asked to name the shortcut. You may enter whatever you wish here (it is purely for your reference). We used the application name and the virtual drive name SewArt (SewArt_on_Mac). Then click “Next”.

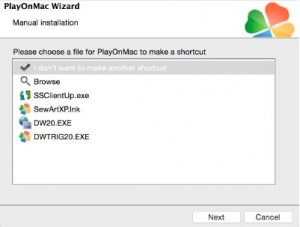
- You will be returned to the shortcut creation screen and asked if you want to create another shortcut. At this point select the option “I don’t want to make another shortcut” and click “Next”.

- This will return you to the PlayOnMac application list with the newly-created icon (for Sewart) on the right and the name you gave it in step 19. Double click this icon to launch SewArt. A virtual wine-drive configuration window will popup to configure the drive and eventually launch the SewArt application. Although the application is running in an emulated Windows environment, you will still be able to access files in your standard OSX file system. To access USB storage devices, browse to /Volumes/<drive-label> in the File->Open dialog.

Running Installed Windows Applications using PlayOnMac
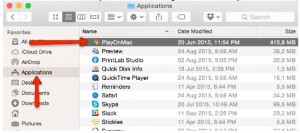
If your PlayOnMac is not currently running or closed after the installation process described above, you must launch PlayOnMac through your LaunchPad or Applications folder in Finder as indicated below. It is necessary that PlayOnMac be running to launch the installed Windows program(s) (in this case, SewArt).
Once PlayOnMac is running you can launch SewArt by double clicking, or single clicking and selecting run, the shortcut icon previously created in the application list shown above in installation step 21.


